Serving a Workflow
Once your nodes and workflows are defined, you can serve them using the built‑in FastAPI server.
Steps
-
Define Your Workflow
Use the @workflow() decorator to create your workflow.
-
Start the Server
Use the CLI command:
This launches the FastAPI server and the React UI.
-
Access APIs and UI
- REST endpoints (e.g.
/api/workflows) let you run workflows.
- The web‑UI at http://localhost:8114 provides an interactive interface.
-
Stream Execution Status
The backend streams workflow progress via Server‑Sent Events at /api/workflows/sse/events.
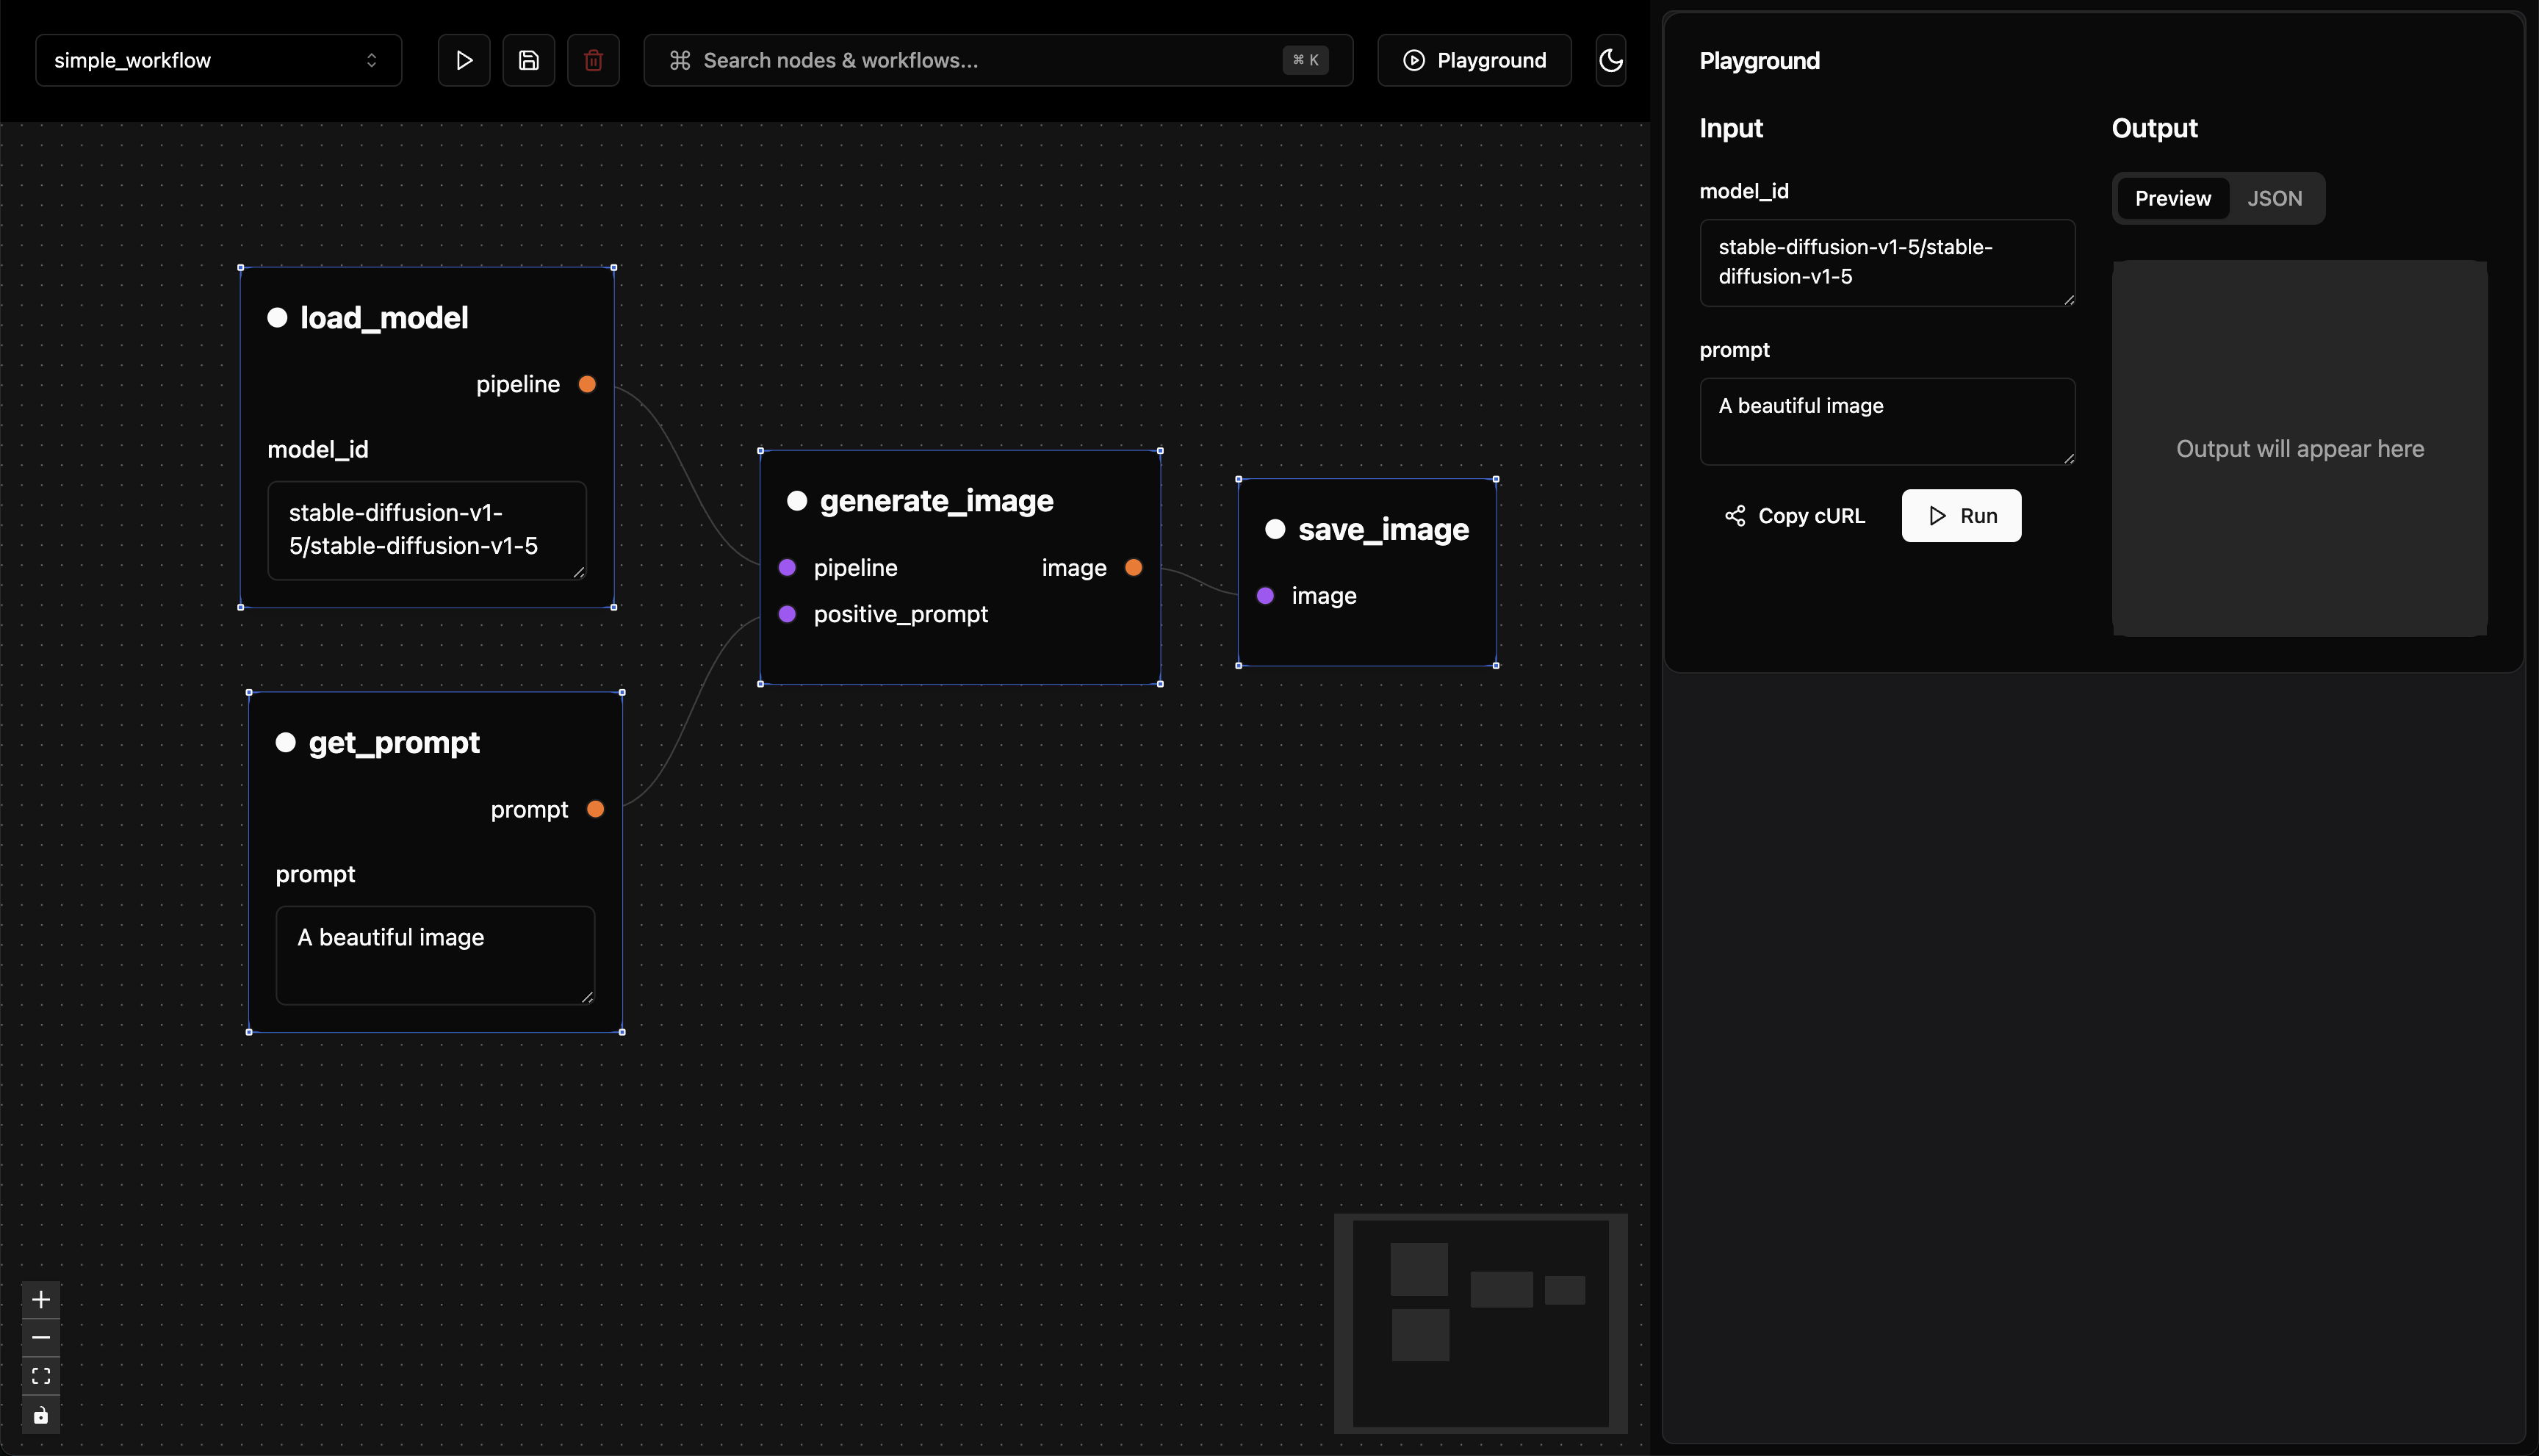 Using the playground UI, you can run your workflow by clicking the “Run” button.
Or you can copy the curl command and run it from the terminal.
Using the playground UI, you can run your workflow by clicking the “Run” button.
Or you can copy the curl command and run it from the terminal.
curl -N -X POST \
  'http://localhost:8114/api/workflows/run/simple_workflow' \
  -H 'accept: application/json' \
  -H 'Content-Type: application/json' \
  -d '{
  "input": {
    "model_id": "stable-diffusion-v1-5/stable-diffusion-v1-5",
    "prompt": "A beautiful image"
  }
}'
{
  "name": "simple_workflow",
  "status": "completed",
  "func_type": "workflow",
  "duration": "36.70s",
  "artifact_id": "1d76ee91-dda0-428a-8386-e3755d3fcca8",
  "artifact_url": "localhost:8114/api/workflows/artifacts/1d76ee91-dda0-428a-8386-e3755d3fcca8"
}
As pipeline-ui is still in early development, the response format for the REST API is subject to change. In the future we want to align to replicate.com format as much as possible.